Pages

Sunday, December 22, 2013

Becoming Live Aboards


Well we moved onto the boat last night. It was weird seeing the house so empty. It finally did not look like OUR house anymore.  


 I laid my house keys, shed key, mail key on the counter and drove away from the house that has been our home for the last 15 yrs.


 However, as soon as I step on board the boat later that same night I yelled "Honey I'm home!" so the neighbors could hear (the wind was really howling so maybe they didn't). Tamera made me a nice bowl of soup and we unpacked more things from the house that we don't have room for on the boat. As we survey the chaos below we understood more changes are coming.


 Tamera an I were giddy like teenagers with some great secret we could not tell anyone but each other.


Tuesday, November 26, 2013

Altering Course

In the world of cruising every sailor must be able to alter course for the health and safety of the crew.  Kooky Dance is having to alter our course by delaying our departure for a few months.

Leaving from Texas we have a diminishing weather window to make it East in safe and favorable conditions.  Installation delays and minor health issues are causing us to miss our weather window for a December 2013 departure.

It will be far easier to take care of the minor health issues on land where care is available versus at sea where no care is available.

The installation delays are on equipment that is imperative to a safe passage especially in a rough Gulf of Mexico in the winter.

Don't despair.....we are still going cruising ..... just altering course.

We are totally crushed and fighting depression but after a few sleepless nights and a very extensive pros/cons list we have made this decision.....we don't have to like it but we feel it the best decision.


The house has been sold so we will still be moving aboard the boat and continuing with installations and I guess we can work to build the cruising kitty....more tropical drinks ya know.

Scott is taking it far harder than I am and that's saying a lot because I am not taking it so well.........

Thursday, November 21, 2013

Boat Projects can be a little frustrating

Work on the boat is continuing at a constant pace.  Tamera and I find little time (read none) to smell the roses. 

Finished the electrical installations of the Wind turbine generators but did not have sufficient wind to see how it would charge before having to hall the boat out for a bottom job.  Good bye $2000. 
Once hauled out the bottom looked in pretty good shape.   I will need to find out why the boat does not seem to be as fast as it use to be. 
Finished the installation on the AIS (automatic Identification System).  GPS functioned well and we began picking up targets and the alarm sounded for eminent collision.  Having the boat tied up within 1/2 mile of the Houston Ship Channel make the poor AIS freak out.  The closest point of approach (CPA) is set at 6 nm (good setting for offshore but not for ship channel navigation).  All that is great except the unit kept indicating an antenna fault.  I checked for shorts and found none but I will need to check for bad solder joints.  It was very windy when I soldered the connector onto the antenna cable.  It is my suspicion the fault will be there.
I have been testing the SSB radio and I am pleased with the receiving performance however I have not tested the transmit performance.  I have not finish the ground plane installation and it requires working in very tight quarter with a 900 degF soldering iron.  There have been numerous other projects needing attention that this particular exercise could wait for.

The boarding ladder is complete and took a bit more effort than anticipated.  I needed to figure out how to mount it to the boat securely.  The ladder is also what the inflatable dinghy will be lashed to during transit, meaning the ladder mount had to be very secure.  I eventually figure something out and had to head to the house to fabricate it.  The mount will be secured to the coach roof with threaded inserts that had to be ordered and the ladder will need some rubber bumpers which also needed ordering.  All these things on order meant the ladder mount project could not be finished.

Work on the dinghy cover continues with its 3rd fitting on the boat.  Sorry we don't have any pictures of it.  The idea of keeping photographic logs of the effort does not always take front and center when everything and I mean everything is taking longer to accomplish and costing more than expected. 

We took the outboard motor for the dinghy down to the boat and also the outboard motor lift.  The lift needed modification and the mounting plate on the boat did not accommodate the bottom swivel for the column.  More on this in later post but suffice to say that that project is still not complete.

While we have accomplished a large number of projects we still have many more to do.  It will only be more difficult to do them underway and it will get more expensive the farther east we get.  I am starting to have doubts about our sail away date of Dec 1.  If I am realistic it could be another 3 weeks and that by coincidence is also the shorted day light of the year.  In other words we will be sailing mostly in the dark and cold.  Everybody knows that cruising is all about sailing in the cold with little sun light. Ha Ha Ha.

Pardon us but we are starting to feel the pressure.


Saturday, November 16, 2013

Sail away Progress by Scott (Capt)


Well, Scott here and I have not posted in a while however, thankfully first mate Tamera has made some good postings of our progress.  Again it is not for lack if things to do.  Much of what has happened are small nagley bits that will not look good in a blog but they do mark some significant advances towards our disappearance over the horizon.  Our emanate departure is closer at hand than it has ever been.  Projects are nearing completion on the boat, we have an offer on the house, one of the cars is sold, we have a pile of charts and the boat looks more like a cruising boat every day.  Lets talk about it.
This is the dinning room with much missing.

The house is emptying out.  A lot of things are being sold or given away.

We took a trip out to Maryland to see my folks and store some of the things we cannot bring ourselves to part with.  We also presented mother a number of nice keep sakes she seemed to really appreciate.  Mother shares the house with a women named Pat and they look after each other pretty well.  To pat we gave our 42" TV.  It was a really good visit.   I also got to visit Father and had two really good visit.  He was coherent and treasured the little photo album Tamera and I made of our sailing trip in the BVI.  I am glad I got to visit with both of them.
We remember this old 19" TV from the guest room
Sure do miss the big guy TV though.

While we were there we did a little reconnaissance and looked at the cost of slips in the Rock Hall MD area.  Kinda pricey.  I think we will be mostly on the hook for the few months we are there. The drive out was pretty good the leave were changing and the views on the hills were spectacular.

I would expect that we will get to the Chesapeake Bay by boat next summer around the beginning of July and spend about 4 months before joining the Salty Dawg Rally to the British Virgin Islands.  It leave about Nov 4- 8 depending on weather.  More on our sailing plans in another post.

The Boat:


The electronic communication equipment installation is coming together.  we fired up the SSB radio and receiver weather faxes as clear as a bell.  We even picked Hawaii and Australia but weakly.  We installed a few more LED lights to replace the old halogen ones and installed a light over the sink that became dark when we installed the cabinets over the sink thus blocking the existing light.  First mate was very appreciative. 

First mate also wanted a sink cover.  There is not a lot of counter space on the Caliber 40 and a good bit of it is the lid for the freezer.  Often in order to get something out of the freezer you have to move a lot of the stuff you are working on to get to it.  I had made a sink cover that covered only on of the two sink but it kept falling into the sink when it shifter around.  Tamera said she wanted a cover for both sinks with finger holes for removing it.  We took some measurement and made a template out of a shopping bag.  I finished in a day and we went down to test fit it.  I had to shape the corners to fit and take it back to the house for final coating. 

I had been kicking around the idea of another book shelf on the back of the recently installed galley cabinets.  I did not pursue it due to all the other things that still needed attention.   Tamera explained the error of my ways and the next thing I knew I was out in the garage at the house cutting, sanding and coating a new book shelf for Kooky Dance.

Both of these projects were made from scraps of wood left over from other projects.  The sink cover is actually wood from the crate the dinghy kit was shipped in.


There are also all the sewing jobs.  Mostly done by the expert hand of First Mate Tamera.  There is the dinghy cover.  This has been a particularly difficult job because there are no strait lines to work with other than the center line.  Add to that the cover also includes the straps for securing the dinghy to the deck.  There is also the skeglet to deal with. 
We have made two trips to check the fit and I think there will be one more for sure.  I still need to install the D-rings to the dinghy chocks for securing the straps to.  I will wait to do this once the cover is complete.

Tamera has also made a "cockpit pocket" that I started calling the "cock pocket".   I tease her but it is another one of her really good and useful ideas, that are becoming too numerous to remember them all.  Pardon the picture, I was being sneaky and Tamera did not catch it until it was too late.
This pocket slips over the compass binnacle and secures at the bottom.  It holds sunscreen, charts, binoculars, and cans of beer.  It is pretty sturdy and did I mention it can hold cans of beer.


With the addition of the monitor wind vane steering the aft boarding ladder is not as assessable as it once was.  In addition the easiest place to get on an off the dinghy will be from the side of the boat and not the stern.  So I needed a ladder.  I took some measurement and made some drawing and went down to the local welder to get it fabricated.  I really think the fabricator should offer his customers oxygen when he tells his customers how much he is going to charge them for said ladder.  Anyway it turns out I did not need the oxygen but just thought I did.  Besides he probably would have charged me for that as well. 
The ladder may actually look kind of heavy for the application but my intention here was to also be able to use the ladder as a gang plank if we have to med-moore.  It is 8' long and plenty stout for such use.
This ladder will be stowed athwart ship and will actually serve to secure the inflatable Zodiac dinghy when it is deflated for passages. This gives me something stout to secure the dinghy to and keeps it off the deck and sail trim lines. 

Effects of getting this close:

I am surprised at my reaction to all this progress.  The more that gets done the more things seem to pop up that still need doing.  Add to this is a feeling of intense apprehension.  I don't know everything we are going to encounter out there, I don't know if we are ready, I don't know how I am going to adjust to this new lifestyle, I don't know how long the money will last, I don't know if I am going to make some stupid mistake that damages us somehow.

What I do find is inspiration from my first mate.  I am reminded that we are a team and that we have worked well together for 28 yrs.  Her drive and momentum is pulling me alone regardless of any apprehensions I have.  I go through periods of intense anticipation and then apprehension.  I get a little sad about the friends we probably will not see for a while and the house we are saying good by to after 15 years of fixing it up the way we liked it.

I still want to do this but it is taxing my courage to do so.  Our boat card has the saying from one of my favorite movies "Cloud Atlas"; "Our survival demands our courage" and by golly they are right.

Sunday, November 3, 2013

Scott is retired !!!

Scott is a free man and ready to enjoy his new life !!  The retirement party was great fun and we will miss all of the great people we met while living in Texas.  We hope many of them get a chance to meet up with us someday in some exotic location.

Thanks all for making this a fantastic day in our journey.

This was the highlight.....the Alarm Clock Smashing Ceremony.....so much fun.

Monday, October 21, 2013

Wind Turbine Installed

Another productive weekend....we got the wind turbine installed.  It is a 600 watt Sunforce wind turbine and Scott can tell you more about the reason we choose this unit and about the installation.  I just want to show photo's and thank John Jacobs for his most excellent help.

 John Jacobs and Scott very hard at work installing the pole for the wind turbine.
 John Jacobs works on the turbine and takes time to smile.
 Scott with the finished product...one of our power sources...next up solar panels.
 The finished product......
 The last two photos are just things of beauty....a rainbow and the top and John's wife Victoria at the bottom........

Monday, October 14, 2013

Ditch Bag - UPDATED

What do you put in your ditch bag?

I did extensive research on items to put in a ditch bag.  Being a bit of a organization freak I probably went overboard but if we ever need to use this bag everyone will be happy I am an organization freak.  Scott suggested I expand the information for the ditch bag so all updates will be in RED.  The bag itself is a floating ditch bag with pockets for the EPRIB and VHF.  The items are put into ziplock bags with items sorted by use like safety stuff together and grooming stuff together and so on.....


If you read this and have any suggestions of something I should consider putting in the bag PLEASE comment. 

Kooky Dance - Ditch Bag Contents

Ø  EPIRB & Hand Held VHF - The EPIRB had to be registered and will be kept on the wall next to the companion way door.  The handheld VHF will have batteries charged and kept close to the companion way door along with the EPIRB.

Ø  2 flash lights - I choose LED flashlights and choose to put two flashlights in the bag because I feel there always should  a back-up.  I have fresh batteries in the flash light and also extra batteries.

Ø  8 “D” Batteries
Ø  10 AAA Batteries
Ø  6 AA Batteries
Ø  50” ¼ rope
Ø  250’ twine
Ø  Fishing kit - the fishing kit contains a telescoping fishing pole with assorted lures.  I also added some additional fishing line and lures.
Ø  Distress flag
Ø  Toilet Paper
Ø  Waterproof matches
Ø  Sun Screen
Ø  Ibuprofen
Ø  Benadryl
Ø  Duct tape
Ø  Sun Glasses
Ø  Reading Glasses
Ø  Glow Sticks
Ø  Ponchos
Ø  Emergency Blankets
Ø  Skin so Soft
Ø  Plastic drop cloth
Ø  Chap Stick
Ø  2 plastic spoons
Ø  Multipurpose tool
Ø  Survival tool with whistle, compass, mirror and light
Ø  Hand Sanitizer
Ø  Clean wipes
Ø  Electrical tape
Ø  Two travel care kits (mouthwash, toothpaste ect)
Ø  Ziplock bags
Ø  Trash bags
Ø  2 towels
Ø  2 rags
Ø  Food – see attached list
Ø  Ice packs
Ø  Hand held flares
Ø  First aid kit – see attached list

Food for Ditch bag
The food that was selected was based on how long it would last.  I was first checking expiration dates because I wanted the food to last a few years.  But then I came up with a plan:  my plan is to once a year we are going to have a REFRESH weekend.  I am going to refresh to food items once a year and not try to keep food fresh for many years. It will part of our annual maintenance  - so when we do annual maintenance on the boat will will eat our provision and then refresh the supply.

15 slim Jims snack sticks
4 granola bars
4 peanut butter pouches
1 can almonds
6 high energy trail mix pouches
2 bags beef jerky
4 Protein bars

First aid kit for ditch bag
Being a nurse it was hard to narrow the first aid kit down to a small but usable kit.  My original plan was to grab my whole medical kit and take it on the life raft .... well if you could see the size of my medical kit you would shake your head and say "woman you can't fit all that on a life raft" or maybe Scott would say that.... anyhow the items I put in the first aid kit are simple but able to care for a variety of injuries.  Secretly, I still plan on grabbing the big medical supply kit if I have time and space.

Alcohol wipes
Band aids
Antibiotic cream
Gloves
Gauze
Butterfly bandages
4-0 silk with needle
Tourniquet
Cotton rounds


Saturday, October 5, 2013

Tamera's Retirement Day

Friday October 4, 2013 was my last day at work ...that's right I retired from North Houston Endoscopy and Surgery.

Everyone there is just awesome.  I don't know why but I only expected a card and a few good bye hugs.  I however got the who shebang.  When I first arrived I was greeted with a happy retirement banner and was made to dress like a pirate (of the Caribbean)....


Then when we took a break for lunch they had a wonderful gift bag full of goodies that I could use during cruising.  Too much stuff to list but trust me it was awesome.  They also had a cake which totally surprised me ... remember all I was expecting was a card.
Then we all went outside to "take a group photo" (I thought anyway)  as it turns out we did that and I also saw they decorated my car.  I wish I took a photo of the whole thing because they covered the entire car with plastic wrap and wrote messages on the windows like this....
it was hilarious driving around Houston with this on my window...got lots of honks and crazy looks.

I thought the fun was over but NO....I was then awarded "employee of the quarter" and this really really totally shocked me.....What?  Me?  I'm leaving !!!
The fun did not end there.  The "team building" night was a great night of bowling, eating, drinking and laughing. 

I really big THANK YOU to everyone at North Houston Endoscopy for the most awesome retirement day.  I don't think you all realize how much the day meant to me....so much better than just a card !!!!

Sunday, September 29, 2013

The Dream continues

We have made more progress toward our sailing dream.

On a previous post Scott showed the installation of the Monitor Wind Vane and this past weekend we took the boat for a test of the wind vane.  It worked great after a few adjustments.


Other things that have taken place are purchase of our blow up dinghy and motor.  We decided on a roll up Zodiac Zoom and Lehr propane 5.0 hp outboard.  We set it up in the garage to make sure the boat held air well before we launched.  All is well so far...next weekend we take it out for an on the water test.

We also purchased an AED - this is one of those things that were debated for a long time before the actual purchase.  In the end Tamera decided that if one of us needs this once it was worth the money we spent if it saves our life.  Also, you never know who around you will have a heart attack and need saved.

We also bought our "ditch" bag and EPIRB for safety of course.

We finally purchased two sources of alternate power.  We got two 140 watt solar panels and a 600 watt wind turbine.


Finally, Scott installed the control panels for the AIS and SSB.  The actual installation of the tuner, antenna and wiring will be done the first week in October.  So stay tuned....lots more to come.


We also want to give a great big special THANK YOU to Bud and and Jill from SV Earendil who gave us so much great information about cruising.  Just sitting on the boat and hearing about their adventures fuels our dream even more....When we were leaving today and I said good-bye to them I had a huge lump in my throat....I have only know them a short time but they have had a huge impact on our lives.

Tamera

Sunday, September 8, 2013

Scott's latest project....my new galley cabinet.

My idea....Scott's design and craftsmanship.......


After
Before
This wonderful cabinet doubled my galley storage space.......Thank you so much Honey !!!!!

To get an Idea of what it looked like before and after pictures.


Scott here, Honey your reaction was worth all the effort.

Thanks to Tom and Sabrina of SV Honeyrider (http://www.wildcatsailorgirl.blogspot.com/) for the idea of the shelf over the galley sink.  The whole thing was made from scrap wood and epoxy and paint left over from other projects.  The wood came from the dog doors I built in the hall way from the kitchen to keep the dogs out of the rest of the house when we were not there.  The epoxy and paint was left over from the wooden dinghy project.  I did have to buy the hinges and the push button latches.

I built it at the house in the garage.  This is probably the last big woodworking project I will need to do for a while. 

Time to return all of the tools I have borrowed.

By the way that fish tank in the background is for sale if anyone is interested.  Can't take it in the boat. 

Well enough for now.  With this done I can concentrate on the installation of the communications electronics.

Friday, September 6, 2013

Some big projects completed in August 2013


It has been a while since I posted.  Not because we are not doing anything, but quite the opposite.  As Tamera note on her previous post a lot has happen towards getting ready to depart.

Tamera and I have both announced our plans to retire.  There are a lot of people that question our decision and envy it at the same time.  There is a lot to consider in all their reactions and a lot more about our reaction about getting ready to cast off that I found surprising.  I was surprise at the degree of melancholy and anger I felt when we put the house up for sale.
  I understand it is not reasonable but it was honest and it along with other reaction will be the subject of another post but not this one. 
Let's instead talk about project departure progress.

The Mast:
We pulled the mast to have a few things done that were easier to do if the mast was down.
We had mast steps installed.  I am pretty sure that if I need to go up the mast for something, that it would be darn right cruel of me to expect Tamera to haul my big but up in the air.  With the step I can do most of the climbing and Tamera will just keep tension on the halyard.

2) Installed a whisker pole track.  Normally the whisker pole was lashed to the rail on deck.  with the addition of more gear this was proving difficult to maneuver around.  The pole mount and handling is pretty slick.
 
3) Installed a storm tri-sail track.  This is for a 200 sq. ft. 9.5 oz. sail for very heavy weather.  I seriously hope I never need it and have not committed to buying the tri-sail but the opportunity to install the track professionally was not going to be this convenient for a while.
 
4) Changed the mast head lights to LED and replaced the VHF antenna at the same time.

5) Installed a GAM SSB antenna on the back stay.

6) Installed a TV antenna.  When we are living on board, being able to catch the news occasionally could come in handy.

 
When I went to connect up the electrical to the mast everything went well until I powered up the Radar.  The 12VDC breaker kicked out.  I rechecked the wiring and fixed a broken signal connection but the radar still would not turn on.  I trouble shot the cable and found 5 wires shorted to the cable shield in the section of cable in the mast.  One was the +12VDC to the antenna unit and was likely the reason the breaker would kick off.  I thought the riggers had put a screw thru the cable while installing items 1 thru 5.  I purchased a new cable and I got the riggers back out there.  When they pulled the cable there was no evidence the cable had been penetrated by a screw or rivet.  I closer investigation it looks like the original installation at the boatyard was done incorrectly and was causing the cable to be pinched.  It cost me a little bit extra to sort this out but in all likelihood the radar would have failed in the near future and would have done so in rough weather conditions, so I am looking at this as a bit of luck at finding the problem while it was a little problem before it became a big one.


The Monitor wind vane Autopilot:

We purchased a monitor wind vane autopilot with the swing gate mount to preserve the use of our aft swim / boarding ladder.  Our friends (the Mass's also on a Caliber 40) had warned the installation was difficult and to be very precise on the dimensions.  Monitor supplied some installation drawings but the installation instructions did not match.  Monitor explained the installation instruction are generic and to follow the installation drawing. 
The installation involves drilling a lot of holes in our boat and in stainless steel tubing.  I think it is worth mentioning here that I chose to do this work at the dock during the hottest week this year in Texas in August. 
There are a lot of parts to the Monitor with the swing gate and did I mention the installation involves drilling a lot of holes in our boat and in stainless steel tubing.  The friends I had helping me did not have much experience working on fiberglass boats and burnt up my wood bits drilling holes thru the fiberglass that was 1 1/2" thick in some places.  Did I mention we had to drill thru a bunch of stainless steel tubing? 

But after 2 days we had success.  
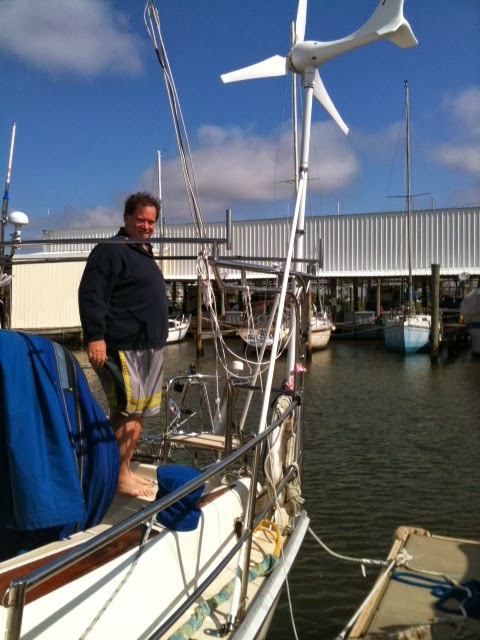
The swing gate worked and everything appeared to work.  Pictured is my best friend Henry Dubois of Bayou Jack LA.  He stayed the whole week to help out.
 
We have not yet test the wind vane autopilot under sail and our cruising friends (Jill & Bud of SV Earendil) are quite interested in our test because they are not happy with how theirs is working and often choose to not use it.  Not really the feedback you want to hear after installing it.  Did I also mention I had to drill a bunch of holes in our boat? 

Getting to some of the thru bolts on the inside of the hull was also difficult and not covered in the installation manual.  Some were impossible and due to their location were critical to the Monitor support frame.  We actually had to cut out the flooding bulkhead forward of the rudder post in order to reach the underside of the bolts.   

Pictured is the piece we cut out.


And also pictured the piece that will replace it.  The replacement piece will be bolted in instead of glued in so it can be removed if access is needed again in the future.  We will seal the wood and screw holes with epoxy so we won’t have to worry about water intrusion. 
 

The Dinghy to the Deck Mounting:

This project was the one that kept me up thinking late into the night.  The dinghy deck mount had to be very strong.  Not because the dinghy weighed very much but because I did not want the dinghy breaking lose in bad weather.  It also could not compromise the structure of the boat and had to fit around all this other deck gear.  Additionally the dinghy is a nesting dinghy, meaning is breaks into two part that nest together.  The deck mount had to accommodate and secure both section of the dinghy. 
I thought about using wood but worried about cracking over time and the work entailed to address this was going to be complicated and require tools I did not have.   I had some leftover deck boards from a work shop I had built.  These were molded plastic boards made for outdoor use that were 1-5/8” thick.

So I used the deck boards and started laying it out.   I was able to cope the piece to fit the dinghy at house (where the dinghy was stored) but had to take the rig down to the boat to cope the pieces to fit the boat. 
 
I found some heavy brackets and threaded inserts at McMaster Carr.  The thru bolting to the deck would be with ½” SS bolts.


The deck boards were grooved to accept the exact contour of the dinghy.   The dinghy bow section fits with the pointed bow positioned in a pocket in the forward piece and the aft section of the bow piece drops into contoured pocket in the aft piece.  The aft section of the dinghy lays over the bow section and rest on the deck support pieces.  The whole thing will be strapped down into D-rings screwed into the ends of the deck boards.


The holes board thru the deck were drill over size and filled with epoxy with high density structural fill for strength.  I still had to work out what I was going to do with the headliner inside the cabin.  I looked like I would have to remove a bunch of head liner and the grab rails in order to get at the bolt end on the inside.
 
I called George McCreary (the owner and builder of Caliber yacht and asked his advice.   He agreed that pulling down the headliner and the grab rail would be a big job and further that it was unlikely that it would look as good when put back up.  There would be wrinkles.  He said that some Caliber Owners just cut a hole in the headliner and scabbed some boards to the underside of the deck and re-stapled the headliner to that.  Once that was done they made a cover and covered the whole thing up.  I had to admit I favored this idea because it made it easy to inspect the bolts when the urge struck me. 

Long story short the dinghy deck mount was finished and the fit was pretty amazing. 


The Bimini Support:

The bimini support I got put on the boat was great for keeping the sun off but was not going to be able to reliably support solar panels and the additional antennas in heavy weather.  Caliber makes a pretty rugged support but at the time I bought the boat I chose not to get it.  I know, big mistake and very short sighted but at the time (late 2008) I was finding it very hard to find enough chargeable hours as a consultant to make ends meet. 

Fast forward to today and I talked George into making me some Caliber bimini supports and shipping them to me.  I have to say the George was very reluctant because the supports were generally fit to the boat and a certain amount of mechanical skill and shipwright knowledge would be needed. 

George was correct and then some.  When the pieces showed up they had been damaged in shipping.  NOTE: if the package looks damaged do not accept it and think you can straighten it out later.  Once you accept and sign for the package it is yours.  This is a lesson we had to learn the hard way. 
An end of one piece was smashed and the other was bent.  I made a drawing of the repair for the smashed end and George had it made and sent to me.  I install the repair and did I mention I had to drill holes in stainless steel tubing.  Thick walled 2” diameter tubing.  I did not see a way for me to straighten the other and took the piece to the local stainless fabricator and for $20 he straightened the piece so I was back in business.  We had to trim the upper and lower bushings but we eventually got them installed.  Did I mention drilling big heavy stainless steel tubing during the hottest week of the year?  I did not think so.
We set the old bimini frame on top temporarily until the new bimini frame is made to fit the new supports.  Did I mention we are also getting a new bimini frame and dodger install in September (we hope).  We contracted a guy to build the unit and pay down 50% of the price and have not heard from the guy since.  I sure it will be OK :).

I think this post has gone on long enough, but most of the big jobs are done.  There are still about 400,007 little one to go but we have 55 days to complete them.