It has been a while since I posted. Not because we are not doing
anything, but quite the opposite. As Tamera note on her previous post a
lot has happen towards getting ready to depart.
Tamera and I have both announced our plans to retire. There are a lot
of people that question our decision and envy it at the same time. There
is a lot to consider in all their reactions and a lot more about our
reaction about getting ready to cast off that I found surprising. I was
surprise at the degree of melancholy and anger I felt when we put the
house up for sale.
I understand it is not reasonable but it was
honest and it along with other reaction will be the subject of another
post but not this one.
Let's instead talk about project departure progress.
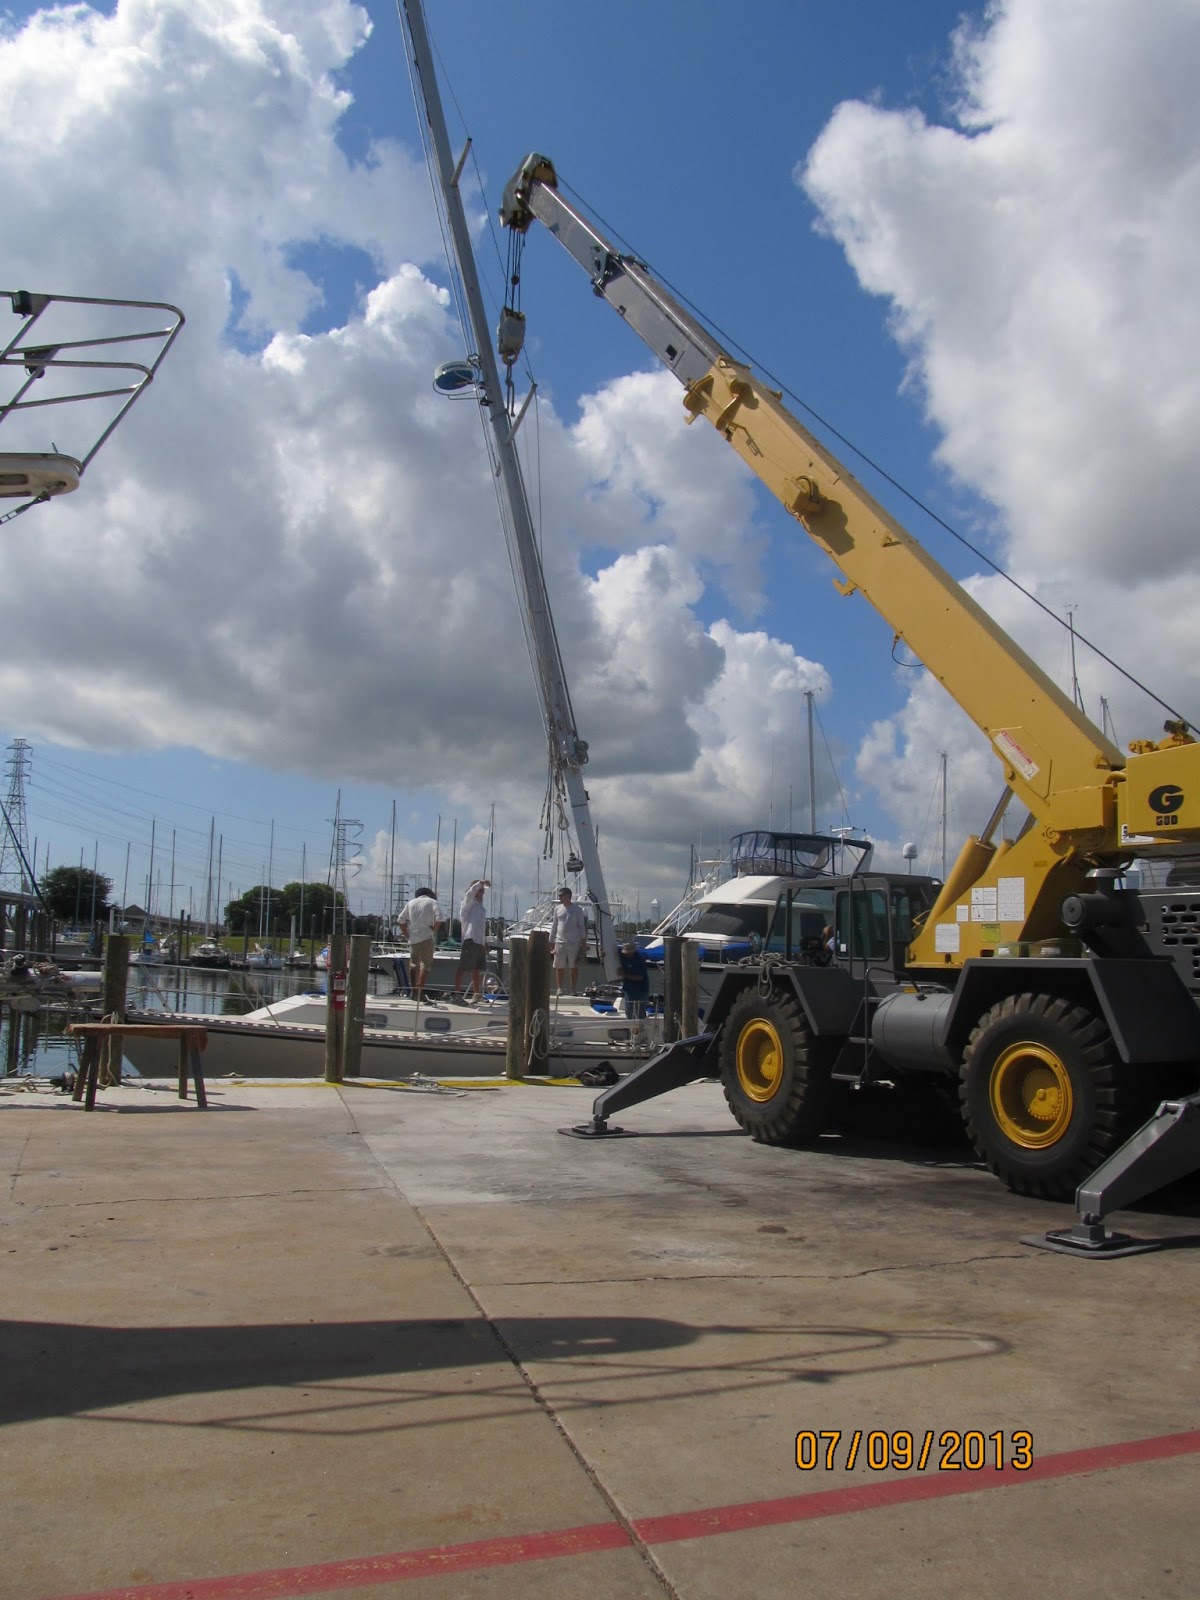
The Mast:
We pulled the mast to have a few things done that were easier to do if the
mast was down.
We had mast steps installed.
I am pretty sure that if I need to go up the mast for something, that it would
be darn right cruel of me to expect Tamera to haul my big but up in the
air. With the step I can do most of the climbing and Tamera will just
keep tension on the halyard.
2) Installed a whisker pole track. Normally the
whisker pole was lashed to the rail on deck. with the addition of more
gear this was proving difficult to maneuver around. The pole mount and
handling is pretty slick.
3) Installed a storm tri-sail track. This is for a 200
sq. ft. 9.5 oz. sail for very heavy weather. I seriously hope I never
need it and have not committed to buying the tri-sail but the opportunity to
install the track professionally was not going to be this convenient for a
while.
4) Changed the mast head lights to LED and replaced the VHF
antenna at the same time.
5) Installed a GAM SSB antenna on the back stay.
6) Installed a TV antenna. When we are living on
board, being able to catch the news occasionally could come in handy.


When I went to connect up the electrical to the mast
everything went well until I powered up the Radar. The 12VDC breaker kicked
out. I rechecked the wiring and fixed a broken signal connection but the
radar still would not turn on. I trouble shot the cable and found 5
wires shorted to the cable shield in the section of cable in the mast. One was the +12VDC to the antenna unit
and was likely the reason the breaker would kick off. I thought the
riggers had put a screw thru the cable while installing items 1 thru 5. I
purchased a new cable and I got the riggers back out there. When
they pulled the cable there was no evidence the cable had been penetrated by a
screw or rivet. I closer investigation it looks like the original
installation at the boatyard was done incorrectly and was causing the cable
to be
pinched. It cost me a little bit
extra to sort this out but in all likelihood the radar would have failed in the
near future and would have done so in rough weather conditions, so I am looking
at this as a bit of luck at finding the problem while it was a little problem
before it became a big one.
The Monitor wind vane
Autopilot:
We purchased a monitor wind vane autopilot with the swing
gate mount to preserve the use of our aft swim / boarding ladder. Our
friends (the Mass's also on a Caliber 40) had warned the installation was
difficult and to be very precise on the dimensions. Monitor supplied some
installation drawings but the installation instructions did not match.
Monitor explained the installation instruction are generic and to follow the
installation drawing.
The installation involves drilling a lot of holes in our
boat and in stainless steel tubing. I think it is worth mentioning here
that I chose to do this work at the dock during the hottest week this year in Texas in
August.
There are a lot of parts to the Monitor with the swing gate
and did I mention the installation involves drilling a lot of holes in our
boat and in stainless steel tubing. The friends I had helping me did not
have much experience working on fiberglass boats and burnt up my wood bits drilling
holes thru the fiberglass that was 1 1/2" thick in some places. Did I
mention we had to drill thru a bunch of stainless steel tubing?
But after 2 days we had success.
The swing gate worked and everything appeared to work. Pictured is my
best friend Henry Dubois of Bayou Jack LA. He stayed the whole week to
help out.
We have not yet test the wind vane autopilot under sail and
our cruising friends (Jill & Bud of SV Earendil) are quite interested in our test because they are not
happy with how theirs is working and often choose to not use it. Not
really the feedback you want to hear after installing it. Did I also mention I had to drill a bunch of
holes in our boat?
Getting to some of the
thru bolts on the inside of the hull was also difficult and not covered in the
installation manual. Some were
impossible and due to their location were critical to the Monitor support
frame. We actually had to cut out the
flooding bulkhead forward of the rudder post in order to reach the underside of
the bolts.

Pictured is the piece we cut out.

And also pictured the piece that will replace it.
The replacement piece will be bolted in
instead of glued in so it can be removed if access is needed again in the
future.
We will seal the wood and screw holes
with epoxy so we won’t have to worry about water intrusion.
The Dinghy to the Deck Mounting:
This project was the
one that kept me up thinking late into the night. The dinghy deck mount
had to be very strong. Not because the dinghy weighed very much but
because I did not want the dinghy breaking lose in bad weather. It also
could not compromise the structure of the boat and had to fit around all this
other deck gear. Additionally the dinghy
is a nesting dinghy, meaning is breaks into two part that nest together. The deck mount had to accommodate and secure
both section of the dinghy.

I thought about using
wood but worried about cracking over time and the work entailed to address this
was going to be complicated and require tools I did not have.
I had some leftover deck boards from a work
shop I had built.
These were molded
plastic boards made for outdoor use that were 1-5/8” thick.


So I used the deck boards and started laying it out.
I was
able to cope the piece to fit the dinghy at house (where the dinghy was stored) but had to take the rig down
to the boat to cope the pieces to fit the boat.
I found some heavy brackets and threaded inserts at McMaster
Carr. The thru bolting to the deck would
be with ½” SS bolts.
The deck boards were
grooved to accept the exact contour of the dinghy. The
dinghy bow section fits with the pointed bow positioned in a pocket in the forward
piece and the aft section of the bow piece drops into contoured pocket in the
aft piece. The aft section of the dinghy
lays over the bow section and rest on the deck support pieces. The whole thing will be strapped down into
D-rings screwed into the ends of the deck boards.
The holes board thru the deck were drill over size and
filled with epoxy with high density structural fill for strength. I still had to work out what I was going to
do with the headliner inside the cabin.
I looked like I would have to remove a bunch of head liner and the grab
rails in order to get at the bolt end on the inside.
I called George
McCreary (the owner and builder of Caliber yacht and asked his advice. He
agreed that pulling down the headliner and the grab rail would be a big job and
further that it was unlikely that it would look as good when put back up. There would be wrinkles. He said that some Caliber Owners just cut a
hole in the headliner and scabbed some boards to the underside of the deck and
re-stapled the headliner to that. Once
that was done they made a cover and covered the whole thing up. I had to admit I favored this idea because it
made it easy to inspect the bolts when the urge struck me.
Long story short the
dinghy deck mount was finished and the fit was pretty amazing.
The Bimini Support:
The bimini support I got put on the boat was great for
keeping the sun off but was not going to be able to reliably support solar
panels and the additional antennas in heavy weather. Caliber makes a pretty rugged support but at
the time I bought the boat I chose not to get it. I know, big mistake and very short sighted but
at the time (late 2008) I was finding it very hard to find enough chargeable
hours as a consultant to make ends meet.
Fast forward to today and I talked George into making me
some Caliber bimini supports and shipping them to me. I have to say the George was very reluctant
because the supports were generally fit to the boat and a certain amount of
mechanical skill and shipwright knowledge would be needed.
George was correct and then some. When the pieces showed up they had been
damaged in shipping. NOTE: if the
package looks damaged do not accept it and think you can straighten it out
later. Once you accept and sign for the
package it is yours. This is a lesson we
had to learn the hard way.
An end of one piece was smashed and the other was bent. I made a drawing of the repair for the
smashed end and George had it made and sent to me. I install the repair and did I mention I had
to drill holes in stainless steel tubing.
Thick walled 2” diameter tubing.
I did not see a way for me to straighten the other and took the piece to
the local stainless fabricator and for $20 he straightened the piece so I was
back in business. We had to trim the
upper and lower bushings but we eventually got them
installed. Did I mention drilling big heavy stainless steel
tubing during the hottest week of the year?
I did not think so.
We set the old bimini frame on top temporarily until the new
bimini frame is made to fit the new supports.
Did I mention we are also getting a new bimini frame and dodger install
in September (we hope). We contracted a
guy to build the unit and pay down 50% of the price and have not heard from the
guy since. I sure it will be OK :).
I think this post
has gone on long enough, but most of the big jobs are done. There are still about 400,007 little one to
go but we have 55 days to complete them.